Static code quality measurements with SonarQube, JaCoCo and UnitTests
21 Jan 2016 | by Martin BreuerThis post will guide you from scratch to a (nearly) full features static code quality analysis using SonarQube, JaCoCo and UnitTests with Junit. As most tutorials out there are quite outdated, this one will give you a basic ground using the latest versions of mentioned tools and plugins.
The usage of SonarQube is limited to a local instance. Doing the same against a remote server shouldn’t be a problem once you have understood the basics.
Requirements
Before we start please make sure that your Android SDK is up to date and your Android Studio is at least version 1.5. Also basic Gradle knowledge is required as well as the latest gradle version which is 1.5 for the plugin and 2.8 for the wrapper.
SonarQube
First we need to get the latest version of SonarQube. Version 5.3 was just released, so we will grab that from their download page.
Unzip the downloaded package to a location of your choice. On Linux I prefer to keep such software in /opt.
After unzipping, go to the SonarQube folder and deeper into the bin directory. There you see a list of folders. Chose the one matching your operating system and start SonarQube with a matching executable.
On Linux you might want to start the bin/linux-x86-64/sonar.sh with the parameter start. Windows should provide you with dedicated start and stop scripts.
After a few seconds you should be able to browse SonarQube via localhost:9000.
SonarQube Configuration
Now we should start and configure SonarQube. Therefore you need to login into the administrator account. On the top right you see the login link. Login using “admin” and “admin” which is the default. For a non local server I highly recommend to change the password immediately!
Next we install all necessary plugins. Go to the “Administrator” page and select “Update Center” in the “System” dropdown. Select now the “Available” tab and install the following plugins:
- Android
- Checkstyle
- Findbugs
- Git
- Java
- XML
It could be possible that some of them are already installed. You can check if they are there when you activate the “Installed” tab. The installations are currently just pending, you need to restart or stop/start the SonarQube server with the previously mentioned scripts.
Quality Profiles
Quality profiles define a set of rules that is used to measure the project quality. Some plugins like Android or FindBugs are providing their own set of profiles. To use them all you need to make a chain of profiles. Best would be if you create a profile with a good name and set a parent. After that you select that parent profile and define a parent for that as well. Do that repeatedly until you have a chain containing all profiles or the profiles you want. In the end it could look like this when you select your own profile
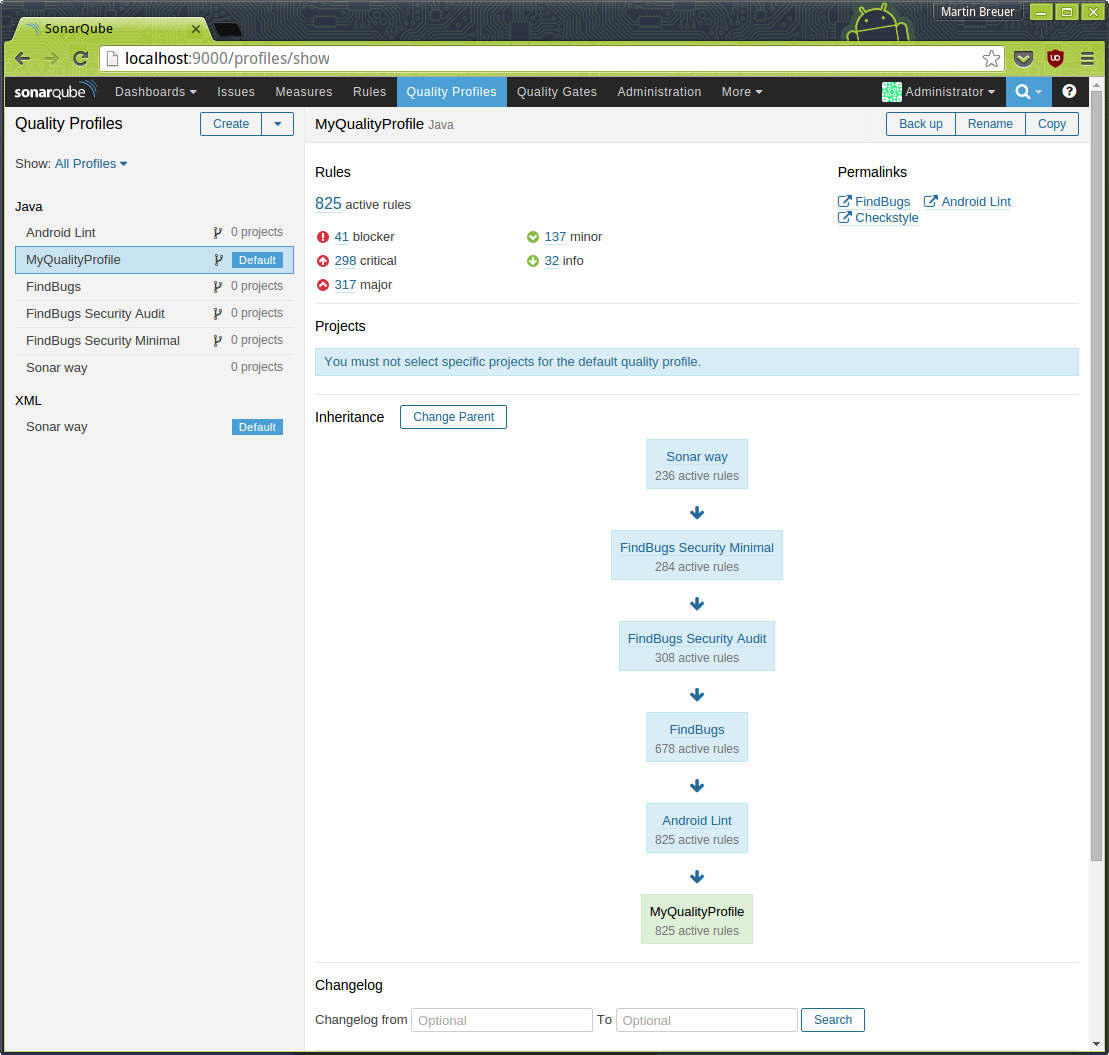
Don’t forget to set your profile to default so that we do not need to configure that later!
Quality Gates
Quality gates are good to verify the sonar check outcome. You can for example define if new code needs a code coverage of x% and if you fail to meet this criteria, the quality gate failed and you will see it immediately.
The built-in SonarQube way quality gate is a good starting point. It checks if your code coverage is below 80%, if you have new blocker or criticial issues and if your technical debt ratio increased by more than 5% for the new code. All checks are compared with the previous version, so keep an eye on when you change the version number. Probably the best way would be to have that increased at the start of a new development, so you always see the changes you introduced compared to the last version.
You can modify the quality gate as you wish. I would suggest to create a new one with a good name or copy the SonarQube way to have a starting point.
Android Studio and Gradle
Note: For an easy understanding, I would suggest to create a new project with default settings. So I just have a project with a blank activity and no fragment created. This way you will see the needed changes easier.
Gradle Basics
To enable coverage report generation, we need to set a flag to true. This testCoverageEnabled flag should be set to true in the debug build type and to false in release. Your build type definitions should look like this
buildTypes {
    debug {
        testCoverageEnabled true
    }

    release {
        testCoverageEnabled false
        minifyEnabled false
        proguardFiles getDefaultProguardFile('proguard-android.txt'), 'proguard-rules.pro'
    }
}
For understanding purpose, we also add at least a develop product flavor. Why will be obvious later. So lets do that
productFlavors {
    develop {
        // currently nothing special here
    }
}
SonarQube requires the app version to track differences between app versions. So we need to “publish” this information so that we can use it everywhere. Add the following line to gradle. Best would be above the android block
def APP_VERSION = "1.0.0"
ext.set('AppVersion', APP_VERSION)
Now we can use AppVersion everywhere as a variable.
JaCoCo Setup
There is a really good gradle plugin which will generate gradle tasks based on your flavor and build type setup: jacoco-android-gradle-plugin
The setup is easy, we need to add the classpath to the root gradle file
buildscript {
    repositories {
        jcenter()
    }
    dependencies {
        classpath 'com.android.tools.build:gradle:1.5.0'
        classpath 'com.dicedmelon.gradle:jacoco-android:0.1.1'
    }
}
And after that we can apply the plugin in our module gradle file
apply plugin: 'jacoco-android'What kind of reports are generated should be defined in a separate extension, just add this to your module gradle file (outside the android block)
jacocoAndroidUnitTestReport {
    csv.enabled false
    html.enabled true
    xml.enabled true
}
Finally we make sure that we are using the latest version of jacoco by defining that in a jacoco block (outside the android block)
jacoco {
    toolVersion = "0.7.5.201505241946"
}
After syncing the project we can see the new added tasks under reporting. (Hint: Open the gradle view on the right side of Android Studio, press the “expand all” button and just type “jacoco”. Navigate through the list of hits with the arrow keys and you should be able to find the tasks easily.)
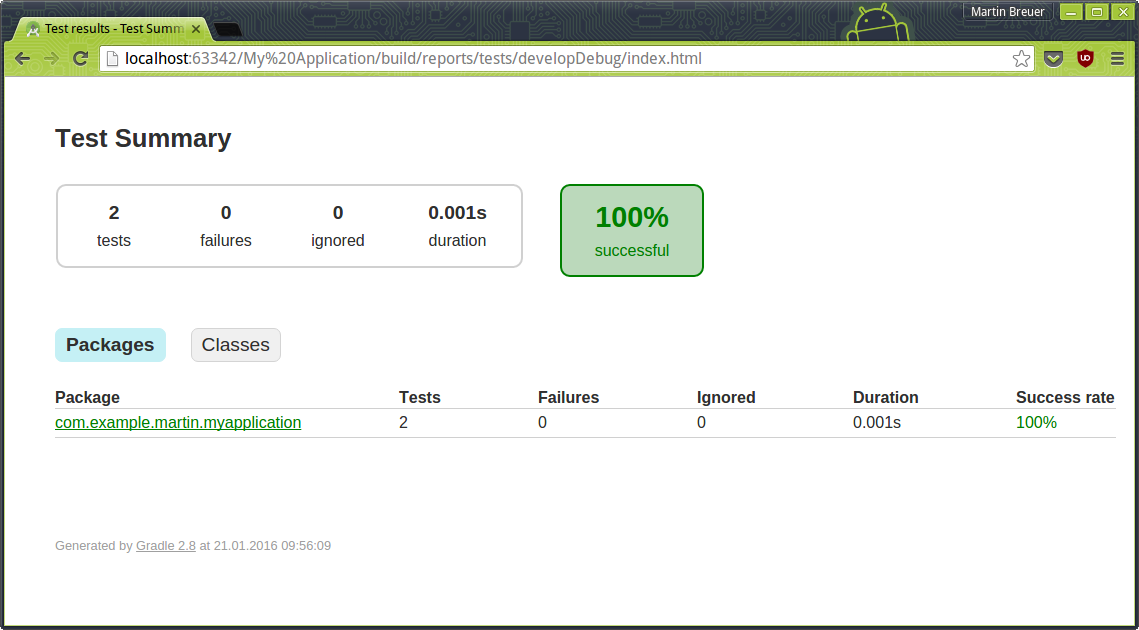
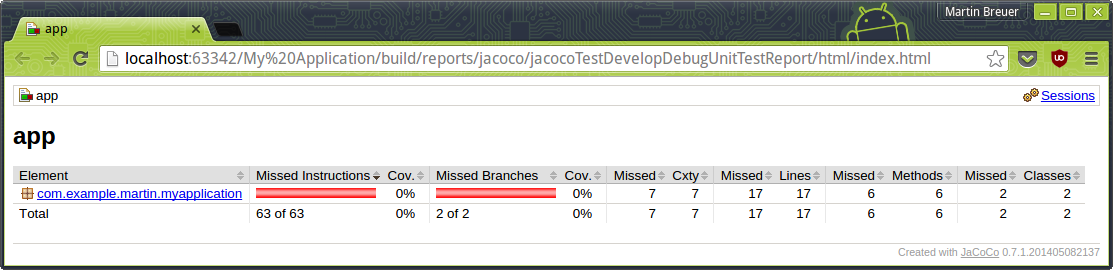
For a test run lets just run the jacocoTestReport task. When the task is finished, you can see the generated reports when you go to your module build folder. There should be a reports directory containing jacoco and different reports. You can open the index.html that you find in the html subdirectory directly in a browser to see the results nicely enhanced and browsable for details (just right click and select Open in Browser -> Default).
Inside the jacoco folder you also see a tests folder where you can see a list of all tests and some small details as well.
Warning: The `tests` folder will always be created even when a test fails. If one of two tests fails, you will see 50% successful rate in the generated HTML page. The reports on the other hand are not generated as soon as one test fails. So you have to make sure that your written tests are all working correctly, otherwise you will not see any reports.
So now that our tests are working and jacoco creates the reports correctly, we will continue with SonarQube.
SonarQube Plugin
Lets start with adding the SonarQube plugin to the top of the build.gradle. The SonarQube plugin already supports the newest plugin format, therefore lets use it!
plugins {
   id "org.sonarqube" version "1.2"
}
Directly after the last apply plugin line in our gradle file, we add a new line with apply from: '../sonarqube.gradle'. Now create the file in your project root folder. Separating different plugin settings into separate gradle files helps keeping the main file small and clean and also gives you the ability to just comment out the plugin with 2 lines (apply plugin and apply from).
There we create a sonarqube {} block and inside we create a properties {} block. We should have this
sonarqube {
    properties {

    }
}
Now the magic begins. We have different properties we need to define. Instead of writing long texts, here is a commented version of the setup I use
// recommend to specify the flavor once and dynamically adapt paths to it
def flavor = "develop" // flavor we want to have tested. Should be static
def Flavor = "Develop" // flavor again, but starting with upper case

// noinspection is used to remove some "warnings" from Android Studio
sonarqube {
    //noinspection GroovyAssignabilityCheck
    properties {
        /* SonarQube needs to be informed about your libraries and the android.jar to understand that methods like
         * onResume() is called by the Android framework. Without that information SonarQube will very likely create warnings
         * that those methods are never used and they should be removed. Same applies for libraries where parent classes
         * are required to understand how a class works and is used. */
       def libraries = project.android.sdkDirectory.getPath() + "/platforms/android-22/android.jar," +
               "build/intermediates/exploded-aar/**/classes.jar"

       property "sonar.host.url", "http://localhost:9000"
       property "sonar.projectKey", "MyAppName" // some shortcut name
       property "sonar.projectName", "My App Name"
       property "sonar.projectVersion", AppVersion

       property "sonar.sourceEncoding", "UTF-8"
       property "sonar.sources", "src/main/java,src/main/res" // first defines where the java files are, the second where the xml files are
       property "sonar.binaries", "build/intermediates/classes/${flavor}/debug"
       property "sonar.libraries", libraries
       property "sonar.java.binaries", "build/intermediates/classes/${flavor}/debug"
       property "sonar.java.libraries", libraries

       property "sonar.tests", "src/test/java" // where the tests are located
       property "sonar.java.test.binaries", "build/intermediates/classes/${flavor}/debug"
       property "sonar.java.test.libraries", libraries

       property "sonar.scm.provider", "git"

       property "sonar.jacoco.reportPath", "build/jacoco/test${Flavor}DebugUnitTest.exec" // path to coverage reports
       property "sonar.java.coveragePlugin", "jacoco"
       property "sonar.junit.reportsPath", "build/test-results/${flavor}Debug" // path to junit reports
       property "sonar.android.lint.report", "build/outputs/lint-results-${flavor}Debug.xml" // path to lint reports
    }
}
This is our complete SonarQube setup. To make everything that is needed before starting the SonarQube check, we would need to start multiple tasks one after the other. To prevent that, I made a short method that executes a list of tasks on the command line (because chaining tasks in gradle somehow failed to work.)
Add the following lines below the sonar block
import org.gradle.internal.os.OperatingSystem;

task sonarComplete(type: Exec) {
    workingDir "./"
    def command = "../gradlew"
    if (OperatingSystem.current().isWindows()) {
        command = command + ".bat"
    }
    commandLine command, "clean", "assemble${Flavor}Debug", "lint${Flavor}Debug", "jacocoTest${Flavor}DebugUnitTestReport", "sonarqube"
}
Now you can just start the task sonarComplete and it will clean the project, assemble your flavor debug, run lint, run unit tests and jacoco and finally SonarQube to check and upload everything to the server.
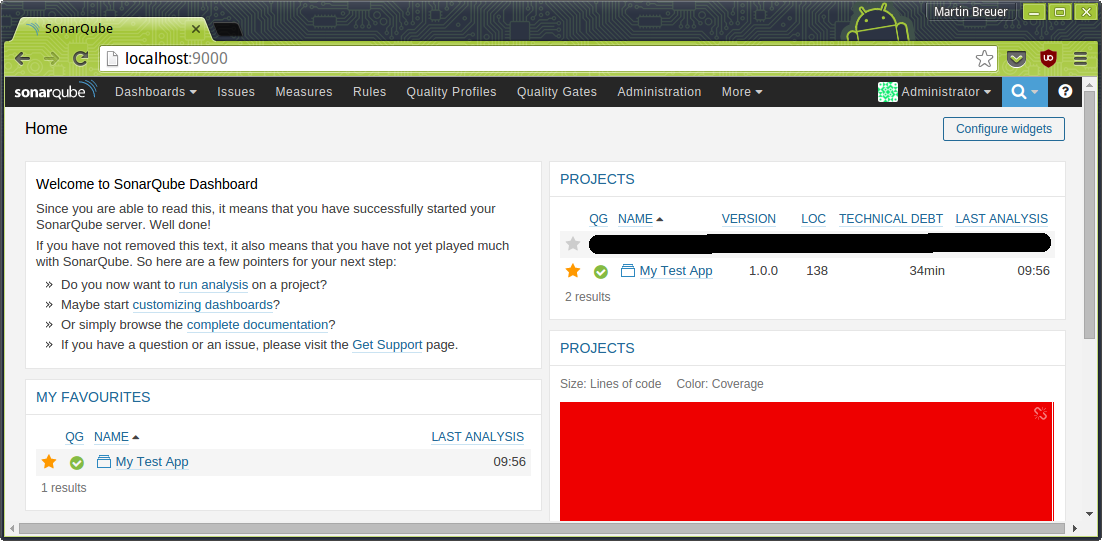
When the task is finished, you should be able open the SonarQube website and on the top right you see the project with the name you defined.
JUnit
If you now want to start to write your own tests you will pretty soon run into an error mentioning that some calls are not mocked.
java.lang.RuntimeException: Method d in android.util.Log not mocked. See http://g.co/androidstudio/not-mocked for details.
    at android.util.Log.d(Log.java)
    at com.example.martin.myapplication.ExampleUnitTest.addition_isCorrect(ExampleUnitTest.java:16)
    ...
To fix that just add the following test option to your android block
// see for details: http://tools.android.com/tech-docs/unit-testing-support#TOC-Method-...-not-mocked.-
testOptions {
    unitTests.returnDefaultValues = true
}
What the future brings
The next step on my side is to make sure that the sonarComplete task is triggered by our Jenkins CI. Over time I will probably tune the quality profiles and gates to our needs. Nonetheless SonarQube is always a great way to get a fast overview about a new and probably big project and code base. So even if your company does not have or want a dedicated SonarQube instance you should consider doing everything locally to help you monitor yourself and learn. Because we need and have to learn new things every day!
If you have questions, suggestions or issues, feel free to ask them!
Sample project
Feel free to check out the sample project I made. There you will see every gradle file and modification I made.
About the author
Martin Breuer is an Android developer for AVM’s Android app. He has been writing Android code since 2009. He lives in Potsdam, Germany with his wife and a daughter.